A Beginner’s Guide To Podcasting Gear
uStudio Staff | Podcasting, Video Production

At uStudio we encourage our customers to prioritize their content first and then their production quality when it comes to producing media that is engaging to their audience. While we stand by this philosophy of content first, we still recommend thinking through your gear set-up.
Due to the popularity of podcasting, you can find gear that will improve your production quality and not put your extra strain on your budget. Researching the right gear for your program can seem daunting, but have no fear - we have done some of the leg work for you.
In this article, we are going to help you decide which equipment is right for you and your podcast production needs.
USB Microphone
If you don’t want to invest in a USB microphone, you can simply use any AUX headphones with a built in mic to capture your audio and the quality will be adequate. Especially if you run your audio through an AI sound enhancer (more on that later).
However, USB microphones are the easiest and provide the best quality when capturing your podcast dialog and voice-overs. The easy plug-and-play functionality allows you to get set up and recording within minutes. They require fewer connections and equipment than traditional XLR microphones.
- Rode NT-USB-Mini USB Microphone ($100) - This high-quality condenser capsule delivers professional sound. The built-in pop filter reduces plosives while the cardioid pickup pattern is optimized to reduce noise and smooth frequency response. This is a great entry-level, studio-quality microphone with USB-C connectivity and 3.5mm headphone output with zero-latency monitoring.

- Blue Yeti USB Microphone ($130) - The Blue Yeti is a popular mic within the podcasting community and its sound quality is well-reviewed. It’s a USB condenser mic, so it is able to pick up a greater depth of sound. It can be connected right to your computer.

- Shure MV7 Cardioid Dynamic Microphone ($250) - The MV7 is a dynamic microphone that draws inspiration from the renowned SM7B. It features both USB and XLR outputs, making it compatible with computers and professional interfaces. By utilizing the USB connection, you can activate Auto Level Mode, which enables you to adjust your vocal tone and distance from the microphone. With Auto Level Mode, the microphone takes charge of these adjustments, freeing you from the hassle.

Microphone Stand
Consider a mic stand or a boom arm to get the mic closer to your mouth level and improve sound quality.
Microphone boom arms are great for audio podcasts or radio-style video podcasts. The flexible positioning and ability to swing this out-of-the-way when you’re done recording will make pod life a breeze. You can find mic stands of all types through Amazon and most major retailers that sell electronic equipment. Below are a few of our favorites.

- Knox Boom Microphone arm ($30)
- Blue Compass Broadcast Boom Arm ($100)
- VIVO Black Pneumatic Spring Microphone Arm ($70)
- K&M 23860 Microphone Desk Arm ($280)
Desktop portable tripods are a simple solution for your desk or for when you’re podcasting from a hotel room. Fold-and-go mini tripods will get the job done at a low cost and are a great solution for a panel of guests or seminar-style podcasting. Below are a few of our favorites.
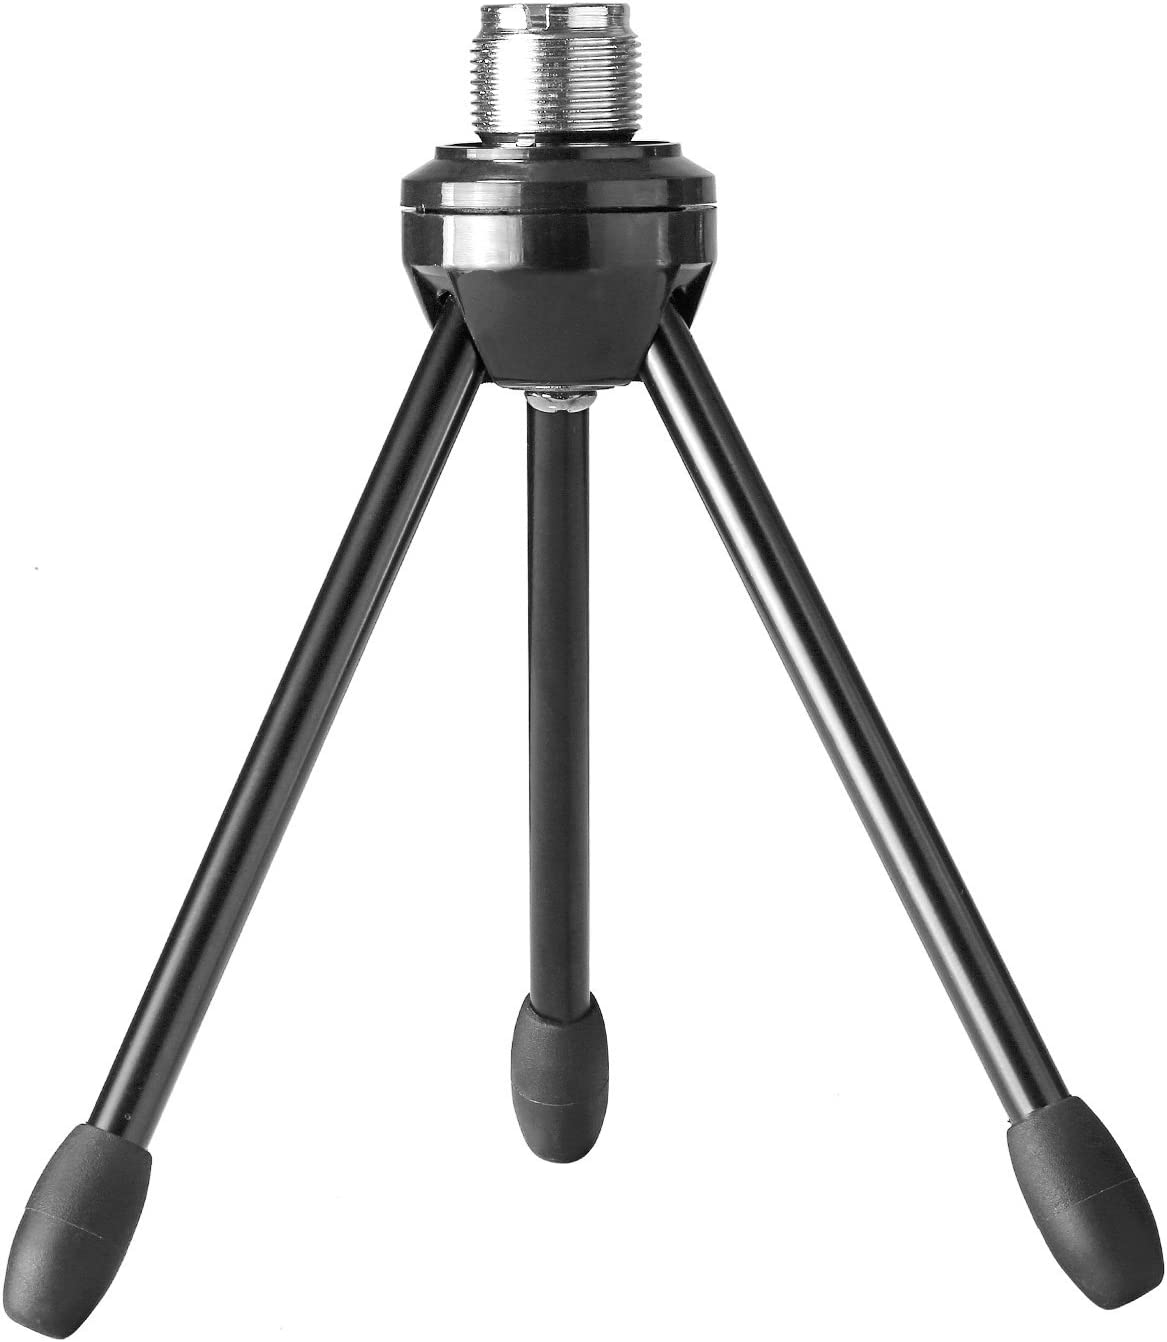
- Neewer Universal Desktop Tripod ($9)
- Ammoon MS-12 - Mini Tripo ($10)
- Antopy Foldable Desktop Stand ($12)
Headphones
Whether you’re in an office, studio, or on the road, you’ll need a good set of headphones (or perhaps two). Use closed-back headphones while recording audio to eliminate speaker bleed and feedback. Although you can use these while editing, we recommend open-back headphones for a non-colored true representation of your audio. While you can use consumer grade headphones, you find that studio quality headphones will maintain true sound without frequency curves.
Closed-Back Studio Headphones
Here are some of our favorites, great for radio-style recording and personal messages:
- Audio-Technica ATH-M20x Closed-Back Headphones ($50) - The ATH-M20x professional monitor headphones are a great introduction to studio headphones. The combination of its modern design and high-quality materials delivers a comfortable listening experience with enhanced audio and effective isolation. This is an excellent choice for tracking podcast audio sources.

- Sennheiser HD280PRO Closed-Back Headphones ($100) - This closed, around-the-ear headphone is designed to exceed the demands of the professional environment. Its extremely robust construction combined with sound quality, modular design, and aggressive noise isolation is necessary in the audio recording field. In studio or on location, you can’t go wrong with these.

- BeyerDynamic DT 770 PRO Closed-Back Headphones ($160) - Professional users all over the world have placed their trust in the classic 770/880/990 PRO range of headphones. They boast extremely detailed resolution and very transparent sound. They are particularly appealing to professionals owing to their bass reference capabilities and spacious reproduction which is absolutely remarkable.

Open-Back Studio Headphones
In most cases, you can use closed-back headphones while editing. However, if your podcast application needs to have precise audio representation we recommend reaching for one of these headphones instead.
- Grado SR80x Open-Back Stereo Headphones ($125) - The sr80 provides improved bass resonance which enhances the overall detail of your audio referencing. Features include a vented diaphragm, no resonant air chamber, standard copper voice coil wire, standard copper connecting cord, and a mini plug with a 1/4” adaptor. This is a great entry-level product from Grado Labs.

- BeyerDynamic DT 990 Pro Open-Back Headphones ($160) - The BeyerDynamic DT 990 PRO headphones are a loyal companion for podcasters due to its wide stereo image and three-dimensional sound reproduction. Outstanding tonal depth ensures that even small changes in the positioning of the acoustic source can be perceived while mixing.

- Audio-Technica ATH-R70x Open-Back Headphones ($350) - These headphones include high-efficiency magnets and a pure alloy magnetic design that reduces distortion and ensures high-frequency response. The carbon composite resin improves structural rigidity to provide a detailed transient response. Its aluminum honeycomb-mesh housings produce a natural transparent sound.

Pop Filter
Pop filters should be utilized for your podcasting mic in order to help reduce the plosive sounds we make when saying words that start with a ‘P’ or ‘T’. These pop filters are a cheap investment but can have a massive impact on how your audio sounds to your audience. Most of these pop filters will work the same, but here are a couple we like.

- Aokeo Professional Pop Filter ($10) - This pop filter is universally compatible with an adjustable gooseneck.
- PEMOTech Pop Filter ($12) - This product is effortless to set up and compatible with a range of microphones. It uses a blend of metal and foam layers to enhance the quality of your vocal recordings.
Sound Treatment
Hard reflective surfaces, like walls and glass, can wreak havoc on your audio recordings by adding hollow-sounding room reverb. The most cost effective solution for sound treatment is to find a small space with as little hard surfaces as possible.
If you record at home, you can accomplish this in a closet or a small bedroom with curtains. If you record in the office and cannot find a space with sound dampening materials, running your audio through an AI sound enhancer is a must to remove reverb.
If you are building a recording studio, you can get reflections under control and record professional-sounding audio in no time with sound treatments for your space. Check out our recommendations for acoustic control devices.
PERSONAL SPACE SOUND DAMPERS
Sometimes you won’t have the ability to install full-room sound treatments for recording or editing purposes. Try reaching for one of these personal sound control devices.

- sE Electronics Reflexion Filter X Portable Vocal Booth ($100) - Acoustic filter technology at an affordable price. Materials are lightweight yet rugged enough to stand up to the most demanding work environments.
- sE Electronics Reflexion Filter PRO Portable Vocal Booth ($200) - This device is an elegant and simple way to improve the sound of your acoustic space and includes six different layers to diffuse the sound waves around the mic. You'll want this on your favorite mic!
ROOM WALL SOUND TREATMENTS
If you are using a studio for your recording, acoustic panels are a good investment.
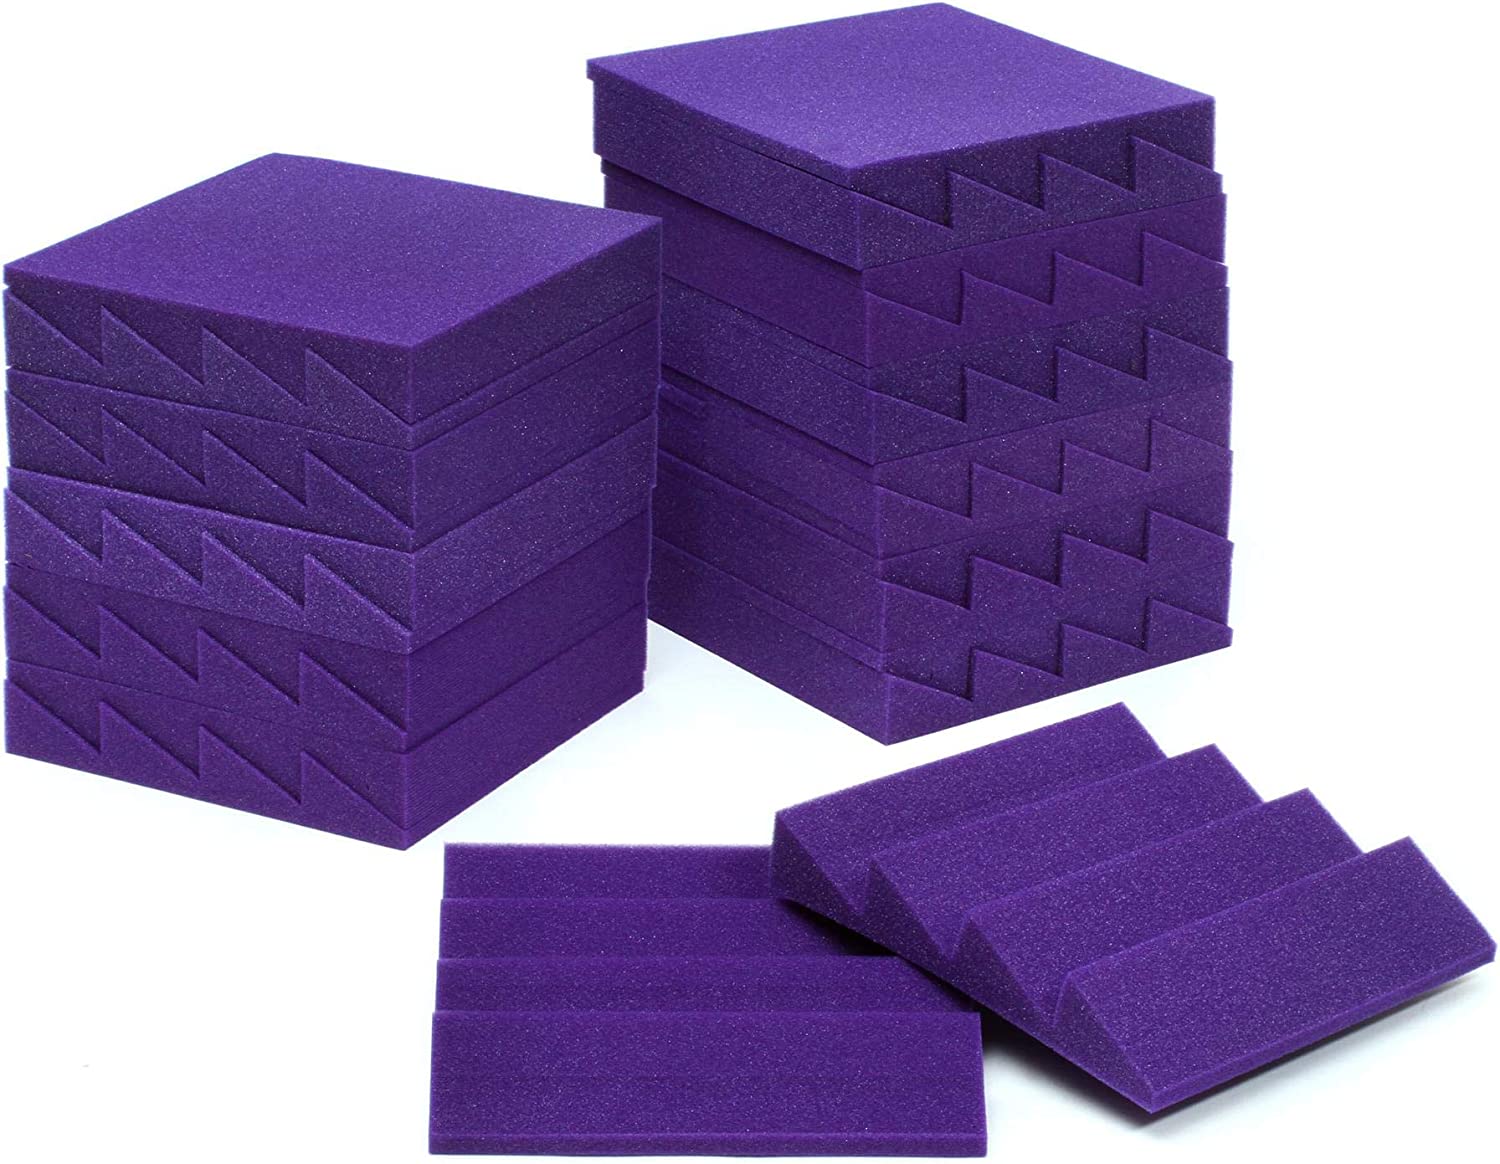
- Auralex Acoustics Studiofoam ($150 and up) - Auralex Acoustics can provide everything you need to outfit your studio with sound-dampening panels. The sky is the limit.
Video Cameras
Video podcasting can improve information retention as some people learn best by visual examples, verbal cues, and body language. There are many options when it comes to video cameras on the market. Determine your application: are your podcasts going to be ephemeral timely updates, or will they be curated for long-term consumption? You may also need more than one camera depending on if you’re producing a show that involves single or multiple subjects.
By far the cheapest option is to simply use the webcam that is built into your computer. However, if you need to do high quality video recordings, we recommend the following stand-alone and USB cameras.
STAND-ALONE VIDEO CAMERAS
If you’re looking to curate content you’ll want to get the best camera your budget can afford. Like audio, video quality is one of the most important technical aspects of video podcasting. For this application, you’ll want a camera that supports 1080p and/or 4k. This will help ensure your content format will be viable for years to come. The following can all be stand-alone for when you don’t want to be tethered to a computer or can be used as a super high-quality direct-to-computer webcam depending on your podcast style. Here are a few choices to get you started.
- GoPro Hero 9 Video Camera ($300) - HERO9 Black delivers stunning 5K video and 20MP photos. Add HyperSmooth 3.0 stabilization, powerful features, and a durable, waterproof design, and you get more of everything you love.

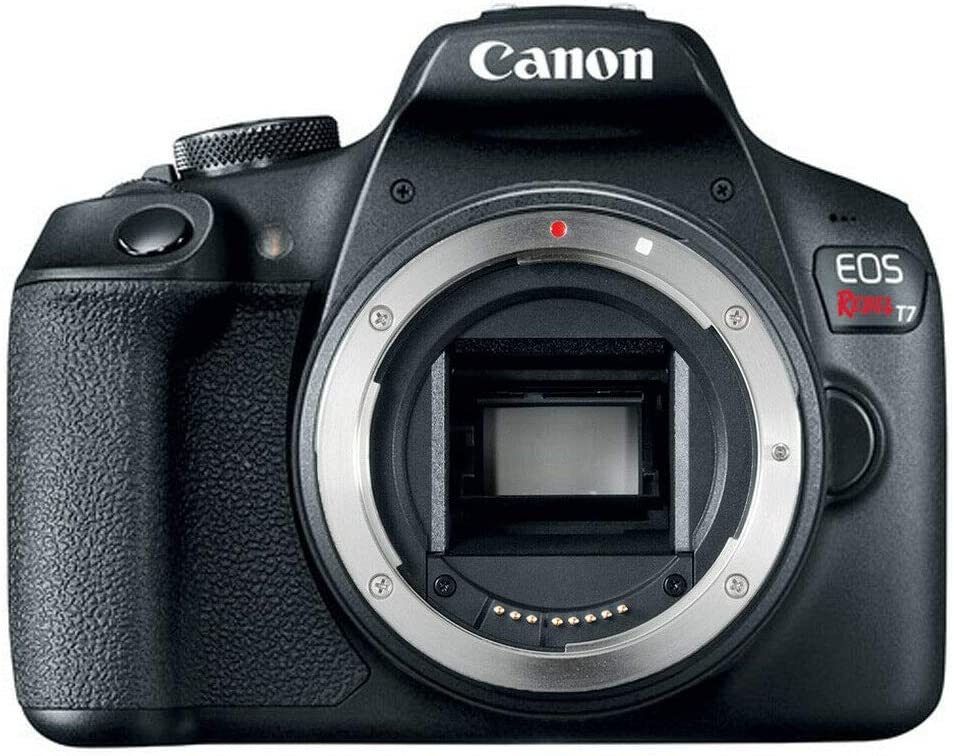
- Canon EOS Rebel T7 Video Camera ($400) - The T7 produces high-resolution video with notable clarity and reduced noise. With its superior sensor, processor, and lens, this camera will bring your video podcast to life. The optical viewfinder and 9-point auto-focus system increase accuracy and focusing speed to dial in your subject. Supports 1080p, 720p, 480p video, and Wi-Fi transfer.
USB WEBCAMS
If your podcasting needs are geared more towards temporary or timely information distribution, you’ll probably be best served by using the built-in camera on your computer, or upgrading to a higher quality aftermarket webcam. These cameras are suited for recording personalized messages to disseminate to your team. USB cameras are somewhat limited; if your needs include mobility or multiple subject matters, you’ll be better off investing in the stand-alone cameras. Here are some USB cameras that can improve your video quality beyond what’s built into a computer.
- Logitech Pro Webcam ($200) - This 1080p HD webcam supports H.264 with Scalable Video Coding and UVC 1.5 encoding technology. By putting video processing within the camera, it is able to adjust dynamically to the available bitstream and enable more PC bandwidth. The result is a smoother video stream in applications. It is perfect for product demos and podcasting.

- Mevo Start ($400) - Stream your podcast anywhere with the Mevo Start wireless HD live streaming camera. Stream amazing 1080p HD video directly to platforms like YouTube, Twitch, and Facebook Live. Wirelessly control your Mevo and create compelling content with features like Auto-Director, all from your smartphone.

Video Editing Software
With video podcasting comes bloopers, stumbles, odd pauses, and loud coworkers - you name it! You’ll need video editing capabilities to clean up those rough takes and make quality video podcasts. The below options for video editing software range from simple and easy to use, to in-depth and full-featured.
- FXhome HitFilm Express ($0) - Powerful but limited option for quick edits and small productions—free on Mac or Windows.

- Apple iMovie ($0) - Limited to the Mac and iOS platforms, this is a great free option for quick editing.

- Adobe Premiere Pro ($250 pr/yr) - Combine Premiere Pro with Adobe Audition and you have a podcast production dynamo. Mac and Windows versions are available.

- Descript ($0 to $24/month) - Descript is a powerful editing software that uses AI to edit. You simply type the edits you want and Descript does the rest. Its simplicity is one of the reasons that popular podcasters use Descript. While we have it under video editing, it will also do audio editing as well.

Audio Editing Software
You’ll need a digital audio workstation (DAW) if you’re making audio or video podcasts to help you edit and polish your audio for podcasts. Add a gate to remove ambient noise, compress your voice so all words have the same loudness, add effects like echo or reverb to emphasize specific words, or just add background music to your cast.
- Audacity ($0) - Audacity is an easy-to-use, multi-track audio editor and recorder for Windows, Mac OS X, GNU/Linux, and other operating systems.

- Apple GarageBand ($0) - Make professional-sounding podcasts right away with GarageBand. Just plug in your mic and choose from an array of voiceover presets. This is a great solution for Mac, iPad, or iPhone.

- Adobe Audition ($250/year) - Adobe Audition is a digital audio workstation from Adobe Systems featuring both a multitrack, non-destructive mix/edit environment and a destructive-approach waveform editing view.

- Adobe Enhance Speech ($0) - This adobe product will take your speech and make it sound like it was recorded in a professional studio. All you have to do is upload your recording and Adobe will generate a professional sounding audio file.

The uStudio philosophy is to prioritize content over production quality when creating engaging media for an audience. However, we still suggest spending time and money on researching and purchasing the proper podcast gear to make your media elements sound pleasing to the audience.
No matter what your budget is, the right equipment is available for you to get started podcasting, or upgrade your current setup.
Transform Communication and Learning With uStudio Today
With a private, secure corporate podcast and Audio/Video media hosting platform. Make every part of your training, enablement, and corporate communications more human and have a support team excited to help you. Getting started with uStudio has never been easier.
We look forward to speaking with you more soon.
—uStudio Team
